Creating Your Own Sparkling Masterpiece: A Guide to Choosing the Perfect Photo for Custom Diamond Painting
Custom diamond painting has become an increasingly popular hobby in recent years. It involves creating a stunning work of art by using small, diamond-shaped pieces to create a mosaic image on canvas or adhesive paper. The end result is a dazzling and intricate masterpiece that sparkles in the light. However, to create the best possible diamond painting, choosing the right photo is essential. In this article, we will explore the key considerations for selecting the perfect photo for your custom diamond painting project, as well as provide tips for preparing the photo and completing the project.
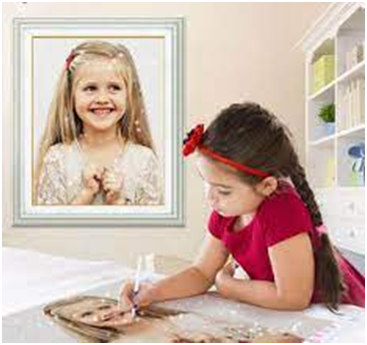
Table of Contents
Considerations for choosing the photo
When selecting a photo for your custom diamond painting project, there are several important considerations to keep in mind. These include:
- Image quality and resolution: The higher the resolution of the photo, the better the diamond painting will turn out. This is because higher resolution photos have more detail, which makes it easier to distinguish between the different colors and shapes of the diamonds. Blurry or pixilated images will not produce good results.
- Image complexity and detail: Diamond painting requires a lot of patience and attention to detail, so it’s important to choose a photo that is not too complex or detailed. Photos with a lot of small details can be frustrating to work with, and may not turn out as well as simpler images.
- Color contrast and brightness: Bright, high-contrast photos will produce the most striking diamond paintings. Photos with muted or pastel colors may not have enough contrast to create a visually interesting image.
- Personal preference and emotional attachment: Ultimately, the best photo for your diamond painting project is one that you feel a personal connection to. This could be a photo of a beloved pet, a favorite landscape, or a special memory. Choosing a photo that has emotional significance will make the project more meaningful and enjoyable.
By considering these factors, you can choose a photo that will make a beautiful and engaging diamond painting.
Finding the right photo
Once you have an idea of what to look for in a photo, the next step is to find the right one for your project. Here are some tips on where to look and how to select the best photo:
- Personal photos: One of the best sources for photos is your own personal collection. Photos of family members, pets, and memorable events can make great diamond paintings. Just be sure to choose a photo that meets the criteria outlined above.
- Stock photos: If you don’t have a suitable personal photo, you can look for stock photos online. There are many websites that offer high-quality images for a fee or even for free. Just be sure to check the licensing requirements before using any images, as some may require attribution or have other restrictions.
- Online resources: Social media sites like Instagram and Pinterest can be great sources of inspiration for diamond painting projects. You can also find groups and forums dedicated to diamond painting where members share their own projects and offer tips and advice.
When selecting a photo, consider the composition and framing of the image. A photo with a clear focal point and good balance of colors and shapes will generally work well. You should also consider the size of the photo and how it will translate to a diamond painting. It may be helpful to print out a test image or create a mockup of the final product before starting the project to ensure that the image will work well as a diamond painting.
Preparing the photo for diamond painting
Once you have selected the perfect photo for your diamond painting project, the next step is to prepare it for use. Here are some steps you can take to get your photo ready:
- Editing the photo: To get the best results, you may need to do some basic editing to the photo. This could include cropping the photo to focus on the main subject, resizing it to the appropriate size for the canvas or adhesive paper you will be using, and adjusting the colors to ensure that they are bright and vivid.
- Printing the photo: Once you have edited the photo to your satisfaction, you can print it out onto canvas or adhesive paper. You can do this yourself using a home printer, or you can have it done at a print shop. Be sure to choose a printing option that will produce high-quality results.
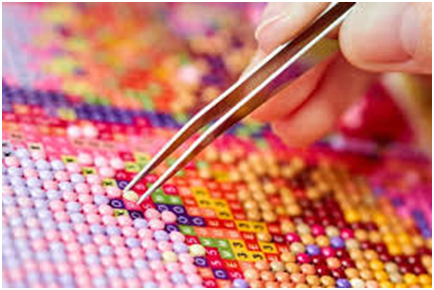
- Adhering the diamonds: Once the photo is printed, you can start adhering the diamonds to the canvas or adhesive paper, following the instructions that come with your diamond painting kit. It’s important to work slowly and carefully, paying close attention to the colors and shapes of the diamonds as you go.
By taking the time to properly prepare your photo for diamond painting, you can ensure that your finished product is beautiful and accurate to your vision.
Tips for diamond painting
Here are some tips for diamond painting that can help you achieve the best possible results:
- Best practices for starting the project: Before you start your diamond painting project, make sure you have a clean and organized workspace. Lay out all of your materials and tools so that they are easily accessible. Take breaks as needed to avoid eye strain and fatigue.
- Tools and materials needed: In addition to the printed photo, you will need a diamond painting kit that includes diamonds, a stylus or tweezers for picking up and placing the diamonds, a tray for sorting the diamonds by color, and adhesive canvas or paper to place the diamonds on. Some kits may also include wax or other tools for making the diamonds stick better to the canvas.
- Techniques for achieving the best results: When placing the diamonds, it’s important to work carefully and systematically. Start in one corner of the image and work your way across row by row, using the color-coded chart to ensure that you are placing the right color in the right spot. Some people find it helpful to place the diamonds in groups of 10 or 20 before moving on to the next section. Once you have finished placing all of the diamonds, go back over the entire image to make sure that all of the diamonds are securely in place and that the surface is smooth and even.

Other tips for achieving the best results include:
- Work in a well-lit area to help you see the colors and shapes of the diamonds more clearly.
- Keep the diamonds sorted by color in the tray to avoid confusion and speed up the process.
- Use the stylus or tweezers to pick up the diamonds by the flat side, not the pointed side.
- If the diamonds are not sticking well to the canvas, you can apply a small amount of wax to the stylus tip to help them adhere better.
- Take breaks as needed to avoid eye strain and fatigue.
By following these tips, you can create a stunning diamond painting that you can be proud of.
In summary, creating a personalized paint with diamonds masterpiece involves selecting the right photo, preparing it for use, and using the proper techniques and tools to place the diamonds on the canvas or paper. Key considerations for choosing a photo include image quality and resolution, image complexity and detail, color contrast and brightness, and personal preference and emotional attachment. Tips for finding the right photo include looking at personal photos, stock photos, and online resources, and selecting a photo with a clear focal point and good composition. When preparing the photo, basic editing may be needed, and the photo should be printed onto canvas or adhesive paper. Best practices for diamond painting include starting the project with a clean and organized workspace, using the appropriate tools and materials, and working carefully and systematically to place the diamonds on the canvas.
With these tips and techniques, anyone can create a stunning diamond painting that reflects their personal style and vision. So don’t be afraid to get creative and start creating your own sparkling masterpiece today!
Also Read: Flower Market Nyc: Complete Botanical Shopping Guide